为应用做iOS8,iPhone6以及6plus的适配
###新的屏幕 iPhone6,6plus的出现让我们在开发中不再局限于320x480了,我们需要在布局界面时考虑更多的适配问题。贴上一张PaintCode的图解
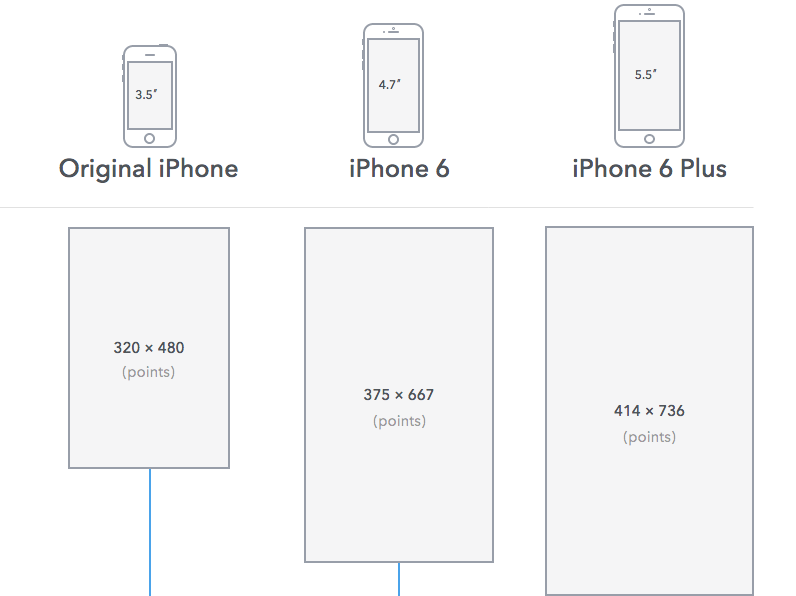
图中是以点为单位,像素x2即可。 在Xcode6中,如果对以前的项目进行编译,默认是不会对项目进行适配6,6plus的屏幕的,xcode默认对原项目进行拉伸显示在新设备上(可能会比较丑),我们可以通过手动设置launchScreenFile设置。而且图片设置我们可以设置3x图片来适应更高的分辨率。

关于手动适配的建议:
只要手动指定了启动图或者那个xib,屏幕分辨率就已经变成应有的大小了,老代码中所有关于写死frame值的代码会让你适配很头疼,如果去手动适配就要全部适配,建议在找到个可行方案前先不要做修改,自动适配方案还算不影响使用。 面对4个分辨率的iPhone,建议使用Auto Layout布局 + Image Assets管理各个分辨率的图片 + Interface Builder(xib+storyboard)构建UI,Size Classes在低版本iOS系统的表现未知。想要这套手动适配方案,起码你的工程需要部署在iOS6+,还不用AutoLayout布局的会死的蛮惨。
###尺寸以及设备信息
做一些横竖屏适配的应用(比如视频播放)可能会发现一个问题,就是当你横屏读取[UIScreen mainScreen].bounds时,跟竖屏时的数值不同,比如竖屏时width=375,height=667,竖屏时就会变为width=667,height=375。而在之前,这个数值是始终不会变的,所以在横竖屏切换时需要注意这个问题。我做的处理是,在程序启动时即收集设备各种信息,存放在内存中。在将来收集反馈,横竖屏尺寸变化以及读设备宽高宏时从内存读取。
- (BOOL)application:(UIApplication *)application didFinishLaunchingWithOptions:(NSDictionary *)launchOptions {
	self.deviceInfo = [DeviceInfo info];
	[self.deviceInfo gatherDeviceInfomation];
	return YES;
}
收集信息通过gatherDeviceInfomation方法收集
- (void)gatherDeviceInfomation {
    self.screenBounds = [UIScreen mainScreen].bounds;
    self.screenSize = self.screenBounds.size;
    self.screenWidth = self.screenSize.width;
    self.screenHeight = self.screenSize.height;
    self.systemVersion = [[[UIDevice currentDevice] systemVersion] floatValue];

    struct utsname systemInfo;
    uname(&systemInfo);
    NSString *code = [NSString stringWithCString:systemInfo.machine encoding:NSUTF8StringEncoding];
    self.deviceVersion = (DeviceVersion)[[DeviceInfo deviceNamesByCode][code] integerValue];

    if (StringEqual(code, @"x86_64") || StringEqual(code, @"i386")) {
        code = @"Simulator";
    }
    self.deviceName = code;
}
DeviceVersion是一个描述设备的枚举,细节可以看Demo
当我们在启动程序时收集了设备信息后,就可以通过定义类似这样的宏
#define SCREEN_WIDTH ([DeviceInfo info].screenWidth)
来全局访问设备信息了,而且之后也不会因为横竖屏而改变。
###SizeClass, Xib+Autolayout的使用
如果我们使用InterfaceBuilder做屏幕适配那将会方便很多。 XCode6中引入了Size Class,淡化了尺寸,而新增了Compact,Regular和Any的概念。 Compact意味着紧凑布局,Regular则宽松,Any任意。
举个例子,比如所有的手机竖屏,在SizeClass的表现为
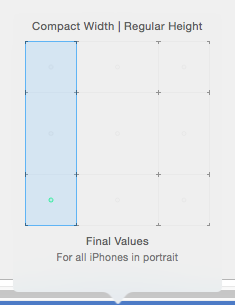
那么横屏则为
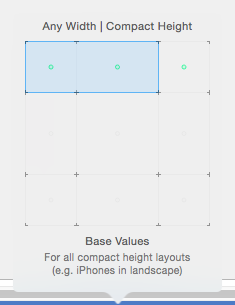
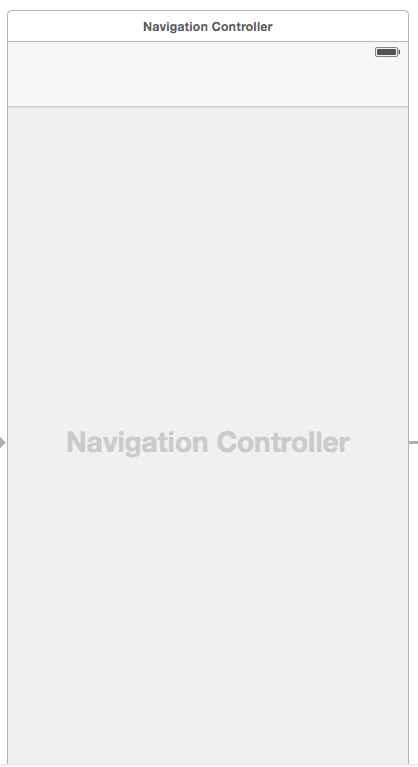
其他的情况可以打开XCode一一去试。 当把SizeClass设置为Compact Width|Regular Height之后,对应Controller在InterfaceBuilder中的表示也会随之改变。 改变前
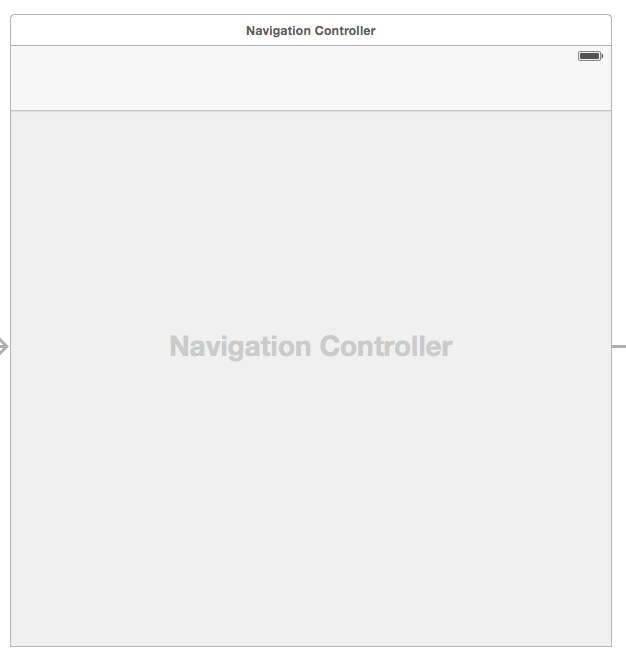
改变后
由于SizeClass在适配不同系统的表现未知,项目中暂时没有使用,而是采用了Xib+Autolayout的方式进行适配。
Autolayout的使用并不困难,核心在于你添加的约束要能确定你视图在不同设备不同情况下的位置。比如我有一个按钮,宽高不变并且在任何宽度的屏幕上,始终贴着Cell的上侧以及右侧。将我的文字需求抽象成约束(Constraint)则表现为
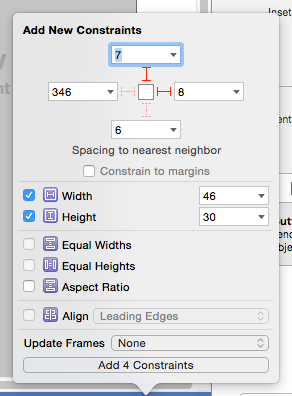
Spacing to neighbor 的约束我加了右侧8上侧7,并且宽高固定,也可以对不同的视图加等宽等高,左对齐等等,但是无论怎么加约束,核心都在于
你添加的约束要能确定你视图在不同设备不同情况下的位置
如果你添加的约束让IB不知道如何布局,或者不小心更改了视图的未知与原来的约束不符,IB都会报警告或者错误来提示你。
我在更改了Button位置后,IB会给提示个警告
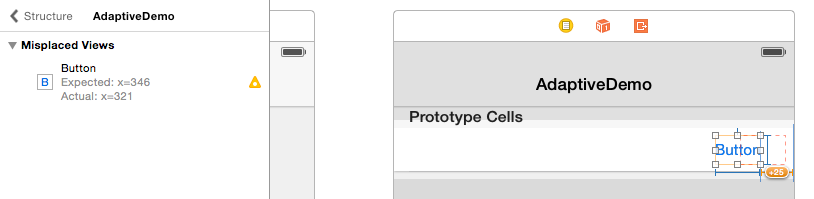
提示按照当前约束的来算,x应该在346点,而现在在321点。点击警告会有修改提示
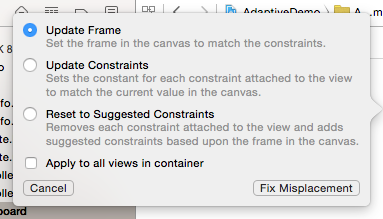
如果选择Update Frame来fix,系统会自动挪动button的位置,而如果是Update Constraints则系统会按当前位置去更新原有的约束来适应当前情形。
正如你在上面看到的,Autolayout的基本工具是constraints。一个constraint描述了两个视图间的几何关系,例如,你可能有一个constraint是这样描述的:
labelA的右边界与buttonB的左边界之间有20像素的空白空间
Autolayout自动处理了所有这些constraints,并且做了一些数学运算以得出所有视图的理想位置和尺寸。你不再需要去手动设置视图的frame-Autolayout为你做了处理,它完全基于你对那些视图设置的constraints。
###代码使用Autolayout?Masonry?
相对于使用IB中的Autolayout,手写代码来创建约束恐怕要恶心很多.
NSLayoutConstraint *constraint = [ NSLayoutConstraint  constraintWithItem:button1
					                               attribute:NSLayoutAttributeCenterX
					                               relatedBy:NSLayoutRelationEqual
					                               toItem:self.view
					                               attribute:NSLayoutAttributeCenterX
					                               multiplier:1.0f
					                               constant:00.0f  ];

[self.view addConstraint:constraint];
这段代码给button1这个按钮创建了一个水平居中父视图的约束。
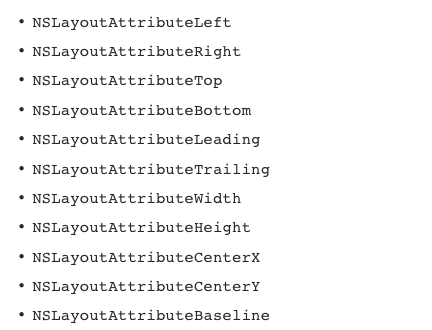
苹果官方支持的Autolayout的一些属性(attribute)有:
我再给button1加一个固定宽度200的约束
constraint = [NSLayoutConstraint
			constraintWithItem:button1
			attribute:NSLayoutAttributeWidth
			relatedBy:NSLayoutRelationEqual
			toItem:nil
			attribute:NSLayoutAttributeNotAnAttribute
			multiplier:1.0f
			constant:200.0f];
[button1 addConstraint:constraint];
可以看到水平居中加固定宽度就要写很多代码,还没有交代高度,垂直方向位置等。constraint也可以设置优先级,在约束有冲突的时候系统优先按优先级高的约束去设置位置。
可以看出来需要配置的参数非常多。苹果还支持一种可视化表述方式VFL来写约束,不过也非常抽象。需要程序员在编写代码时脑子里一直想象真实的表现。在iOS6刚问世的时候苹果首次加入了Autolayout,支持IB以及代码方式。类似于下面
NSDictionary *viewsDictionary = NSDictionaryOfVariableBindings(
	leftButton, centerButton, rightButton);
NSArray *constraints = [NSLayoutConstraint constraintsWithVisualFormat:@"[leftButton]-[centerButton]-[rightButton]"
						options:NSLayoutFormatAlignAllBaseline
						metrics:nil
						views:viewsDictionary];
[self.view addConstraints:constraints];
这里的“[leftButton]-[centerButton]-[rightButton]”描述了三个button的关系,而这三个button是通过NSDictionaryOfVariableBindings存入字典的,这是一种通过变量名快速生成字典的方式。
另外需要注意的是我们需要手动调用setNeedsUpdateConstraints来触发constraints.
无论是使用直接的代码还是VFL代码,Autolayout的代码还是显得有些过多和令人作呕。所以推荐还是使用Xib中添加约束的方式来完成布局。如果真的要用代码的话,这里推荐一个优秀的第三方库:
用法在官方的Readme和demo中有详细的介绍。
引用其中对原生的NSConstraint的比较。实现一个设置四周padding的约束,使用原生代码则为
[superview addConstraints:@[

    //view1 constraints
    [NSLayoutConstraint constraintWithItem:view1
                                 attribute:NSLayoutAttributeTop
                                 relatedBy:NSLayoutRelationEqual
                                    toItem:superview
                                 attribute:NSLayoutAttributeTop
                                multiplier:1.0
                                  constant:padding.top],

    [NSLayoutConstraint constraintWithItem:view1
                                 attribute:NSLayoutAttributeLeft
                                 relatedBy:NSLayoutRelationEqual
                                    toItem:superview
                                 attribute:NSLayoutAttributeLeft
                                multiplier:1.0
                                  constant:padding.left],

    [NSLayoutConstraint constraintWithItem:view1
                                 attribute:NSLayoutAttributeBottom
                                 relatedBy:NSLayoutRelationEqual
                                    toItem:superview
                                 attribute:NSLayoutAttributeBottom
                                multiplier:1.0
                                  constant:-padding.bottom],

    [NSLayoutConstraint constraintWithItem:view1
                                 attribute:NSLayoutAttributeRight
                                 relatedBy:NSLayoutRelationEqual
                                    toItem:superview
                                 attribute:NSLayoutAttributeRight
                                multiplier:1
                                  constant:-padding.right],

 ]];
而使用Masonry则是block中简单的一句话。
UIEdgeInsets padding = UIEdgeInsetsMake(10, 10, 10, 10);
[view1 mas_makeConstraints:^(MASConstraintMaker *make) {
	make.edges.equalTo(superview).with.insets(padding);
}];
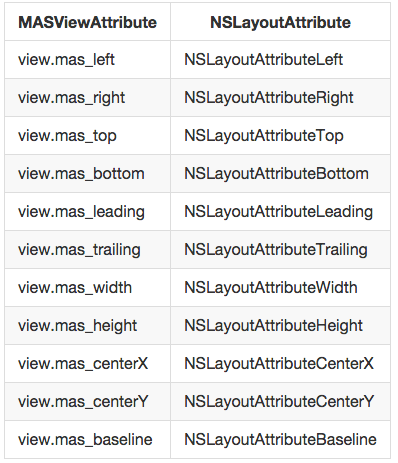
Masonry和NSConstraint的api属性对比
在Masonry中能够添加autolayout约束有三个函数
- (NSArray *)mas_makeConstraints:(void(^)(MASConstraintMaker *make))block;
- (NSArray *)mas_updateConstraints:(void(^)(MASConstraintMaker *make))block;
- (NSArray *)mas_remakeConstraints:(void(^)(MASConstraintMaker *make))block;
/*
	mas_makeConstraints 只负责新增约束 Autolayout不能同时存在两条针对于同一对象的约束 否则会报错
	mas_updateConstraints 针对上面的情况 会更新在block中出现的约束 不会导致出现两个相同约束的情况
	mas_remakeConstraints 则会清除之前的所有约束 仅保留最新的约束

	三种函数善加利用 就可以应对各种情况了
*/
#####实践:让两个高度为150的view垂直居中且等宽且等间隔排列 间隔为10(自动计算其宽度)
int padding1 = 10;
[sv2 mas_makeConstraints:^(MASConstraintMaker *make) {
	   make.centerY.mas_equalTo(sv.mas_centerY);
	   make.left.equalTo(sv.mas_left).with.offset(padding1);
	   make.right.equalTo(sv3.mas_left).with.offset(-padding1);
	   make.height.mas_equalTo(@150);
	   make.width.equalTo(sv3);
}];
[sv3 mas_makeConstraints:^(MASConstraintMaker *make) {
	   make.centerY.mas_equalTo(sv.mas_centerY);
	   make.left.equalTo(sv2.mas_right).with.offset(padding1);
	   make.right.equalTo(sv.mas_right).with.offset(-padding1);
	   make.height.mas_equalTo(@150);
	   make.width.equalTo(sv2);
}];
其实Masonry就是对原生的Autolayout进行了封装,以便于更简洁的使用Autolayout语法。关于其具体使用我们可以下载官方Demo,也可以参考下这篇博客:Masonry介绍与使用实践(快速上手Autolayout)
###远程推送
iOS8中的远程通知API进行了修改,之前的注册方法在iOS8下无法工作。
那么在 iOS 8 下用哪个 API 去注册远程推送功能?用新的 API:registerForRemoteNotifications。
于是我们需要针对不同的系统做不同的代码:
UIApplication *application = [UIApplication sharedApplication];

if ([application respondsToSelector:@selector(isRegisteredForRemoteNotifications)]) {
   	UIUserNotificationSettings *settings = [UIUserNotificationSettings settingsForTypes:(UIRemoteNotificationTypeBadge                                        |UIRemoteNotificationTypeSound                                                |UIRemoteNotificationTypeAlert)
                                                                             categories:nil];
    [application registerUserNotificationSettings:settings];
    [application registerForRemoteNotifications];
} else {
    [application registerForRemoteNotificationTypes:(UIRemoteNotificationTypeBadge
                                                     |UIRemoteNotificationTypeSound
                                                     |UIRemoteNotificationTypeAlert)];
}
if中为iOS8下的配置,else则为之前。
简单的说,Apple 在 iOS 8 将 RemoteNotification 和 LocalNotification 统一了起来。两种 Notifications 将统一由 UIUserNotificationSettings 来管理用户界面相关的东西:标记、声音和提醒。除了统一用户界面的通知外,UIUserNotificationSettings 还引入了 UIUserNotificationCategory,可以让用户方便的直接在 Notification 上进行一些快捷的操作(Action)。
以上为本篇博客全部内容,欢迎提出建议,个人联系方式详见关于。